Can you limit a camera projected texture to only the parts of the scene geometry that the camera can directly see?
-
I have a shot with a 3D-tracked camera moving through a garage, and I want to project a logo texture onto the pillars so that when the camera comes to rest at the end of the shot, the logo resolves into it's final shape.
The track and projection are basically working, but the problem is that currently at the start of the shot the logo projects all the way through the pillars onto the background, and you can see duplicate parts of the logo in different areas of the shot as the camera moves: https://imgur.com/a/L6dNBlu
Is there a way to limit the texture projection only to the areas of the scene geometry that the projection camera can directly see? In other words, is there a way to have the scene geometry naturally occlude the geometry behind it from the perspective of the projector camera?
Ideally each pillar would only include enough of the logo that the pieces all line up at the end, but no more, and the floor would only show the logo on parts that are visible at the end of the shot.
I could manually cut up the geometry with the knife tool and potentially achieve this with complicated selection tags on the material, but I was hoping there would be a more procedural solution if possible.
-
Hi Tom_C,
Cutting up the geometry might not help if any round object in the scene needs a soft transition.
There is no texture Shadow, so we might need to build one.
Anyway, there are no promises, but before exploring it with the 2025 version, what renderer do you want to use? Can you use the standard Render?
Cheers
-
Thanks for the quick reply! I typically use octane, but it is not necessary for this project, I am comfortable using the standard renderer or redshift as well if need be.
-
Hi Tom_C,
It was 18.5 years ago that I gave a week-long master-class about Camera Projection, and that was one question during the week. I love to share the solution here.
This would require a Texture "shadow" option. Since I'm unaware of its existence, I would set up a scene like the one described below.
This is all in file … 01.c4d – below
Create a UV map with zero overlap or tiling for each object.
Place the Projection Camera where needed and lock PSR, the field of view, etc.Place a spotlight exactly where the projection camera is and set the light to no falloff and strong enough to provide white illumination on all objects, which requires a material set to white, no reflection, and no other influences. The light source needs a sharp shadow.
Switch off GI and any other light sources.
Bake Material. These files are in the tex folder.
Save the Project, and save it as "…" with a different name.
This is all in file …11.c4d – below.
We need three materials and three UV tags for each object.
The first on the left is just a "canvas" and has only visible content (black) where the Projection goes. The baked texture goes into the alpha channel.The next step is the difficult part, the projected Image, with the Standard Camera in use to set the Standard Material for Projection.
With that set and the first UV locked, there should be no UV on the right side of the Image Material (Projection). Select the material Tag.Go to Object Manager> Tag> Generate UVW Coordinates. This will produce a UV Tag (Lock It), and the Camera UV Projection is backed.
This Material Tag needs to be set to Add. This can only be done where the pixels from the material on the lap are.This can't be left-sided from anything we have done to get any material on anything else, but when placed on the right, it will overwrite everything.
This is where we use the backed texture again, but inverted. Now, we see this material only in the otherwise transparent (alpha) area. Render to see it.The whole process might be the first time, and it might feel like there are too many steps, but once you see that it is working, you might also feel that it gets faster each time.
Here is the result of the text above. As usual I create it first, then I suggest.
https://projectfiles.maxon.net/Cineversity_Forum_Support/2024_PROJECTS_DRS/20240927_CV4_2025_drs_24_RSlp_01.zipEnjoy
-
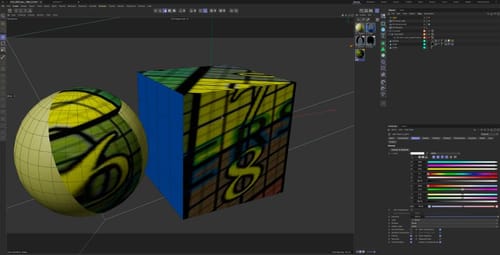
P.S.: Here is a screen shot
-
Wow thank you so much for this, I’ve been pulling my hair out trying to figure out how to get this working! I will try it as soon as I’m back at my office tomorrow, sounds like exactly what I’m looking for.
-
Hi Tom_C,
Thanks for the reply. Let me know how it goes.
Cheers
-
This was extremely helpful, thanks so much for the info! I decided to only use the first step in the process to create a mask for the correct surfaces that I can use in compositing and still use a beauty render from octane, but I'm very glad to know how the whole process would work if I wanted to do it all in C4D for other shots.
-
You're very welcome, Tom_C.
I'll be happy if you can build your solution based on it.
If there is anything else, please let me know, and if there is a new question, please feel always free to open a new thread. Thank you.
My best wishes for your project