Thanks, I had the wrong tag on it! There are 2 Rigid body tags!!??? What the $&*@#^!! I used the one in the Bullet section! Why are there 2 tags with the same name, very confusing!
Thank you for the help, Dr Sassi!!!
Thanks, I had the wrong tag on it! There are 2 Rigid body tags!!??? What the $&*@#^!! I used the one in the Bullet section! Why are there 2 tags with the same name, very confusing!
Thank you for the help, Dr Sassi!!!
Thanks, I had the wrong tag on it! There are 2 Rigid body tags!!??? What the $&*@#^!! I used the one in the Bullet section! Why are there 2 tags with the same name, very confusing!
Thank you for the help, Dr Sassi!!!
I am sure I have done this before,
Place a rigid body tag on an object, go to Scene Settings, and set the gravity to negative and the object should float, correct? I can not get this to work even though I am seeing tutorials on YouTube showing it working. am I missing something? I am on a Mac with he latest C4D.
Thanks, Mark
That was it! I thought the Boole was supposed to do the hiding of the object.
Thank you
Wow is it really that simple!??
I will try it.
Thank you!
I just uploaded the files.
I made a change, I was using Fields to control the PolyFX but have switched to using a Boole to reveal the layer with the PolyFX fixing the issue of the Polys moving at a greater speed while the field exposes the effect.
But the Boole creates artifacts, as seen in the image included in the upload. using the Boole also flashes the PolyFX on and off in our project, This flashing does not happen in this small project, I have seen this before, it seems when you use a boole with an object that is in a null or has an effector it creates strange behavior.
Thanks!
The Redshift Render window is showing a mirrored image of the work window, How is this possible?
I have a disk with a Field controlling an effector to wipe on an animated Poly rotation effect to make the polys move, this works fine in the viewport but when I render it the polys only move while the field is animating on or off, while it is holding the Polys stop moving.
Dr. Sassi please help!
I have attached a link to the project and the materials used.
https://mab.to/t/kkFSlLE0Hwv/us3
Thank you!
Thank you, Dr. Sassi!
This worked perfectly in our main project! The speed slider was the icing on the cake!
Thanks again,
Mark
@Dr-Sassi
Strange, here is a link,
https://drive.google.com/file/d/1Y976NLCkkvAe8RUQTlfBxTP9K06W1Qmm/view?usp=share_link
Thanks
I have a path that makes a gentle sweep and then another that wraps around a hill. I am trying to get a cloned Greek Key to follow this path and animate along it but I don't think I am doing this correctly. I can't get the key to map
/connect to the path. Is there a better way to do this?
I have attached a stripped-down project. We want the key to animate down the path swerving from the left side of the path to the right side, then eventually change this to smooth out making a larger sweep but always mapping to the path if this makes sense.
I think I got it, i somehow found 3d Channel Extract plugin, this must be something new.
Thank you!
Thank you for the video and project
I still can not get it to work. I followed the steps, even when back, and set up a scene just as you had it.
The only thing I see is different is when I set the levels in After Effects my histogram sliders move off-screen, and yours stay on. I am on a Mac, this could be why it is not working.
here is my After Effects file and C4d file along with the .EXR files https://we.tl/t-fHdaaSjlBt
yes, I should have uploaded a project!
Thank you for this!
This looks close but I am looking to make the cloned objects sit on the ground plane, like this only the cylinders sitting on the ground and tilting as in they are actually on the ground.
Thanks, Mark
I am trying to clone an object onto an uneven surface creating a grid with each cloned object sitting flat on the surface of the uneven object/Landscape so they are naturally leaning a bit in a random way but aligned in rows.
Researching this I think I need to clone onto the points of a plane that is projected onto the surface of my uneven object/Landscape. I see in this tutorial https://youtu.be/QVrHxcDC2uE?si=S1e_8js_V4v9QnvI
they do this but this Project Object command does not seem to be in C4d anymore.
I think I can also do this with a Spline but I am having trouble with this as well, I found the Project Mesh but it is very slow and seems to be causing my computer to run out of RAM, is thee a better way?
Thanks, Mark
@Dr-Sassi Thanks for the reply,
I am following a tutorial and it shows the depth field option in the Redshift Renderview window. But I do not see anything. When I render I get a .EXR but it seems to have no data.
Here is a stripped-down project I made to test.
Depth test.c4d
I am struggling to get a depth map render out from C4d. The goal is to be able to add fog in After Effects during compositing.
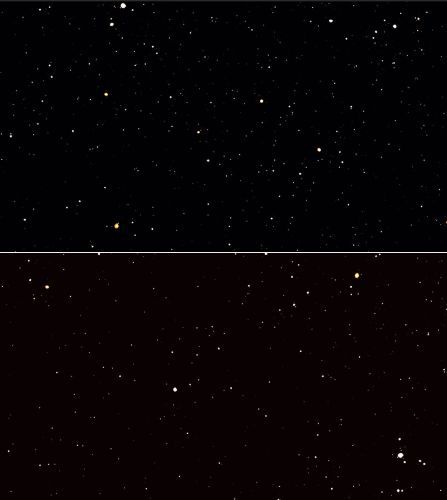
Rendering in RedShift I have enabled Depth in the AOV manager and selected Depth in the Redshift Renderview, but do not see a depth map? Attached is what I am seeing.
Any help would be appreciated.
[Screenshot 2024-02-05 at 3.07.32 PM.png](Image dimensions are too big)
I am linking the emitter position to a layer position but it drifts, To parent is a 2d layer and it looks like Particular is placing it in 3d space, how to I get it to set at 0 in Z, or is there another way? I don't want to create a null. I have hundreds of layers and don't want to have to double them all to get this to work.
Thanks, mark ![Screenshot 2024-01-15 at 9.34.49 PM.jpg](Image dimensions are too big)![Screenshot 2024-01-15 at 9.34.49 PM.jpg](Image dimensions are too big)