Fields color not appearing
-
Ah that's so great, many ways to achieve this.
Thank you for the clarification on Instance vs MoInstance, that makes sense.Thank you Sassi!
-
You're very welcome, AlexC!
I'm glad this works for you.
Enjoy
-
P.S.: This would be the simplest way to get something similar.
It is mainly based on the Field-Driver
-
That's interesting, but how does it work? I tried disabling the Plain Effector, and the effect still works (just not the color), but I can't see how? I see you have an animated remapping contour, but I don't see how the polygons are getting subdivided?
Thanks!
-
Hi AlexC,
It is the Field Driver, the Tag on the object. It changes the parameter(s) based (in this case) on the Noise Field.
https://help.maxon.net/c4d/2025/en-us/Default.htm#html/TFIELDDRIVER.htmlEnjoy
-
Ah got it! Thanks Sassi, that's super interesting.
I do have a follow up question though, with any of these setups : do you see a way to "lock in" to any of the subdivisions individually? I'm trying to create an effect where everything is moving and subdividing, but one polygon "stops" and I can use 4 points to connect splines to it, or extrude it?
Thanks!
-
Hi AlexC,
I might miss a point, so I share this.
Based on the initial project file, each Cloner produced four Clones. Then the next one, four of these, etc.
Since the last four clones of the top Cloner are the only ones that can be selected, given a fixed place, that would be too little.
All previous clone results will move things around.From a practical point of view, if the target would be the smallest of the squares, then stopping that one would also require having three of the neighbor squares stopped, so anything else might change. But well, that is also no longer fully given.
In other words, to fake it. But following the "pseudo fractal rules" (missing a better term here!) of that setup, it won't work either, except for the largest square (below the overall square.)
Here is a fake example:
Cheers
-
Hey Sassi, I think this technique could work. How did you select that polygon? I suppose it would be possible to just stop the animation at a given point and extract it?
In the video you shared with Jonas Pilz and Noseman, their setup allows for selections, but these selections are of each level of subdivision. Would there be a way to extract a single Polygon (or group of polygons) from that selection?
Thanks!
-
You're welcome AlexC.,
There is no fixed point to begin with; everything is moving. This means if there is something to select with a fixed focal point, it is only on the level of the TOP (last executed) Cloner—the top Parent.
My fake was not a selection but an extra manually animated element.
Or do I miss something?
Cheers
-
Yes, that makes sense
")
Could you help me with a rendering issue? I tried this with the standard renderer and Cel Render, as well as with the wireframe render in RS, but I'm still getting a lot of hidden lines appearing in my render.
Here is my file, this is specifically with the method that was put in place by Jonas Pilz in the video you sent, which is quite handy because I can just save the node modifier and add it to different things. I followed his recommendation of adding a multiply node to avoid these diagonal subdivisions from appearing, but even though they don't appear in the viewport, they are still there in the render.
https://www.dropbox.com/scl/fi/05lwkiyrlj3xbvcz1juoo/QuadTreeNodeMod_Wireframe_CV.c4d?rlkey=1bfc9mhgfwvfejig4tkq22jxz&dl=0
Thanks for any suggestions!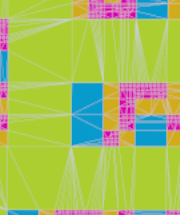
-
Hi AlexC,
Thanks again for the File and for using DropBox.
I have used an Atom Array here to create the lines.
This allows for a quick adjustment of the line size in the Atom Arryay itself. Spheres and Cylinder. (Cylinder can't be larger than Spheres)
The Edge material shows good results typically, but not with N-Gons, hence the triangles during render time. The Atom Array uses only the edges given.
.
Some other adjustments that I hope support your work.
.
I have switched off Global Illumination, as a flat and front-lit object has no need for that; it just would take more time.
.
I have set the camera in the center of the "plane," so it is straight on. In the past, the camera had a 36mm focal length, equal to the"Sensor Size"; sadly, someone changed that to 35mm. Well, it is easily adjusted. With 36mm, the object's width of the object is equal to the camera's distance to get a perfect fit to the render format. This allows them to have no trouble with rotation values either.
.
What I didn't change:
Using the material as Emission Color and Weight set to one, while all others are set to zero instead, might accelerate even more. But I think the GI set to off does it already (speed-wise).My best wishes for your project.
-
This is a fantastic solution! And so customizable! Thank you so much Sassi.
The scene is very speedy and responsive.
Thank you again! -
Thank you very much, AlexC,
I'm glad to hear that it works for you.
Enjoy!