I have cloner objects cloned to the vertices of a spline. I'm trying to animate a Bend modifier on the spline, but when the Bend Strength goes above 12 degrees, the clones flip 90 degrees. How can I prevent this?
Posts made by kariomart
-
Cloner object axis problem
-
RE: Adding displacement to a mesh created from an extruded spline
@Dr-Sassi Thank you so much for everything. It's taught me new and valuable techniques I'll continue to use. One last question: does the organization of the topology (straight rows and columns) or density matter when it comes to RS displacement, or is it just a matter of eliminating n-gons?
-
RE: Adding displacement to a mesh created from an extruded spline
@Dr-Sassi Hi Dr. Sassi,
Thank you so much for this, it's exactly what I was looking for. My technique for the cutout was inspired by a previous post you helped me with.And yes, I'm very interested to know how you remodeled everything, particularly the corners. As far as rendering, do triangles need to be avoided as well?
-
Adding displacement to a mesh created from an extruded spline
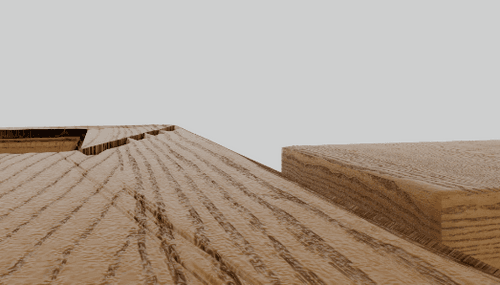
I am having difficulty adding displacement to a mesh I created from an extruded spline. I have an RS material I've created that has a displacement map. I've turned on Geometry Override, Tessellation, and Displacement.
Turning on Tessellation and Displacement gives me distorted geometry, as seen on the left in the screenshot.
Another approach I've tried is to use Volume Builder/Mesher/Remesher to get better geometry, but I could never get a suitable result. The edges were always uneven.
Are there any other options to try or is there a better approach altogether?
Here is the project:
https://drive.google.com/drive/folders/1B_vW1mxtGR6jTfqV12RZPsBq1yC8ErbW?usp=sharing -
Snapping spline handles to zero angle
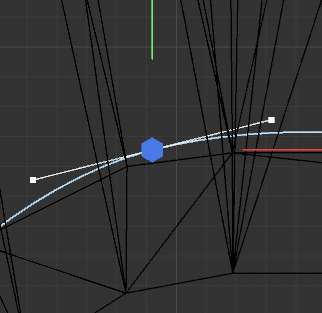
I want to adjust this spline handle to flat and not angled, so the line between this point and the next is perfectly straight along the x axis. I thought the shortcut was holding shift while adjusting but it doesn't work. I've tried every combination of Shift, Alt, and Ctrl, but nothing makes the handle snap to zero angle. How do I do this? -
RE: Vector motion blur causing alpha to not be fully transparent
Hi Dr. Sassi,
Thanks as always for the help! Is this workaround what needs to be done whenever rendering motion blur with an alpha? -
Vector motion blur causing alpha to not be fully transparent
egg_test_v002.c4d
When I turn on Vector Motion Blur, my render does not have a fully transparent alpha. When I turn it off, this issue goes away. How can I render it with motion blur but without this problem? I've also tried rendering with straight alpha turned on and off. -
RE: Cloth won't settle after applying Initial State
Thank you so much for your help on this problem and the two others you answered today! I'll be sure to check out this project and the others.
-
Pose morphing a dynamic object
Is it possible to take an object with dynamics, set an initial state, then use that state as a pose morph frame?
I want to animate a pile of cloth objects that starts from a state of rest, that is set with dynamics so it looks organic, and have it blown away with forces.
I'm having problems getting the dynamics to settle, so I thought Pose Morph might be a solution, if I can establish the initial pose, then a final pose of the clothes off screen. But copying/pasting poses from one object to another isn't work, even though it's the same object. Is it possible to creates 2 different poses with dynamics to use with Pose Morph?
-
Cloth won't settle after applying Initial State
I am using Cinema 4D 2024 and have several pieces of cloth that I simulated falling over a collider object. I want them to be at a state of rest after falling over the collider, so I can then use a wind or attractor to animate the cloth away.
I've attempted to use Init State for the cloth objects, which works except that the cloth never comes to a complete stop, it continues to move. I've tried raising Smoothing Iterations in Project Settings, I tried raising Stickiness and Friction values of the cloth objects, but they still move. What else should I try?
-
Connecting an object to the surface of dynamic cloth
I
Project file: https://drive.google.com/file/d/1jZzFssLjJBV1z46e6dmdpw0YuAKoitCY/view?usp=sharing
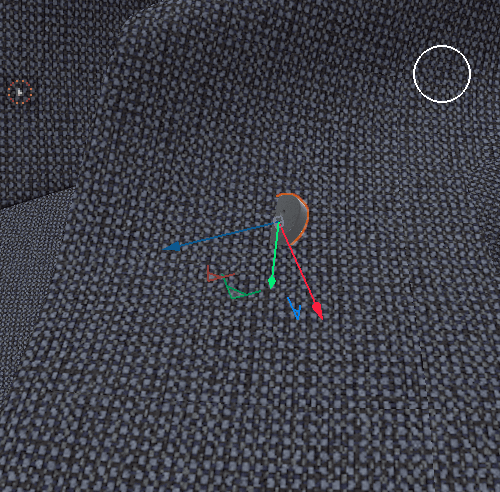
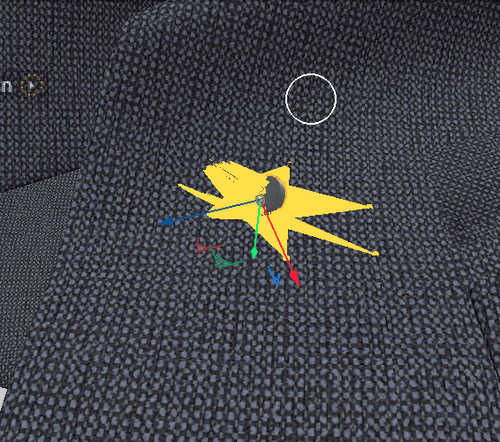
I am trying to "attach" a button to a suit jacket I modeled, using the Connector Tag. I can get the button to follow the jacket's dynamics, but it continuously passes through the jacket. How can I avoid this? I've tried adjusting the button and jacket's thickness value, but it didn't help.
-
RE: Material is rendering very pixelated
Hi Dr. Sassi,
Thanks for the help. I tried updating to 2024, lowering the render resolution to 2K, and setting my Materials' Texture Preview to "No Scaling" but the problem remains.I think I misspoke in my initial post. The issue actually doesn't occur when I render, but only when I click Render Viewport. When I Render to Picture Viewer, the result looks good.
As long as my final render is ok, this isn't a crucial problem, but would you have any idea why Render Viewport renders textures at a lower res?
-
Material is rendering very pixelated
C4D file with textures and screenshots of the problem: https://drive.google.com/drive/folders/1GFFDrHq6Vb7SvFfkh4DtfLGIK79AyN44?usp=sharing
I have a model that I unwrapped and textured, using 2 different PSD files. The PSDs are high enough resolution, but when I render my model, they look very pixelated, even more pixelated than they do in the viewport. It seems to get worse as I get farther from the object.
I'm using the standard render and standard materials. I've set Anti-Aliasing to Best and raising the Min Level doesn't improve it. What else could be causing this problem?
-
RE: Issue duplicating a Volume Builder object
Thank you so much Dr. Sassi! That was exactly the issue.
I have another somewhat unrelated question, but still pertaining to this scene file. Everything is incredibly slow for me, it takes about several seconds just to select a property in one of the Volume Builders, to the point where making changes in values difficult. I have a PC with pretty good specs, 2 GTX 3090s and 128 GB of memory, but my scene responds MUCH slower than the what I'm seeing in the tutorial I'm following.
I realize this could be a million different issues, but is there anything obvious I should check for better optimization? Thanks!
-
Issue duplicating a Volume Builder object
Shift Layer Diagram 051623.c4d
Shift Layer Diagram2 051623.c4d
I followed this tutorial on creating a Redshift foam material.
I'm trying to create multiple objects with this foam material and change the hue for each object. When I duplicate the entire Volume Builder, I don't see it in my render.
I can create a second cube within the the same Volume Builder, but it will remain the same color and also becomes much more transparent than the original cube.
I've included a second project that is using the same material, but after copying and pasting it, it's now doesn't appear in the render and I don't know how to get it back. I'm pretty sure these issues are related to the Volume builder object, but I still don't know what's causing it.
-
RE: Tapering an animated Sweep object
Hi Dr. Sassi,
Thanks so much, your project that uses a plane and Spline Wrap rather than a Sweep Nurb was exactly what I was trying to create. -
RE: Tapering an animated Sweep object
@Dr-Sassi
I see that if I animate the Start of the Mospline, the "tail" animates off tapered, which is what I want. However, when the tail gets very close to fully animating off, it distorts the overall shape. Is there a way to keep the shape uniform? -
RE: Tapering an animated Sweep object
Hi Dr. Sassi,
Thanks for the quick response. Your second file, ANtm_11.c4d, is essentially what I'm trying to create, except I'd also like the shape to animate off, remaining tapered as it does so. Here is an example of the profile I'd like to have throughout the animation: https://drive.google.com/file/d/19v6JB0bSSL4_HM2_NtCRMAlP1bMbprCM/view?usp=share_link -
Tapering an animated Sweep object
Wisp.c4d
I've created this sweep object that I have tapered at the ends, but I don't know how to keep the ends tapered while it's traveling through the spline.Maybe a Sweep object isn't what I should be using, but what I'm trying to achieve is this tapered shape animating through this spline path. I'm using this to create a stylized looking wind.
Here's what I want to avoid:
-
RE: Retiming animation is changing it
Another update! I followed your advice and unchecked "Remove Overshooting" and "Automatic Weighting" (in my current project) and the animation now plays as I want it.
Since I'm trying to understand this conceptually, I still don't understand how I can speed up or slow down this animation without it being altered. If I highlight all my keyframes and use the little 3-line icon above them to scale them to 50%, the joints go off track. And more broadly, If you have a scene that is intricately animated with lots of curves and customized keyframing and now you need everything to animate in half the amount of time, how would you do it?